News:

Vote for WorldScape Classic here! If you vote once every hour, we'll gain more players!

Main Menu
Menu

Show posts

This section allows you to view all posts made by this member. Note that you can only see posts made in areas you currently have access to.

Show posts Menu

Topics - brianc

#61
Hello,

The Master Graphics Artist is back and acceptiong requests for making Signatures.

Make sure you post in this format.


Render Style:
Text1:
Text2:
Text3:
Subtext:
Transperant(Yes/No):


I will be over viewing all requests, be sure to send them in soon, this offer will last until 3/32/11

*Note: All Graphics will be made in High Definition Rendering.

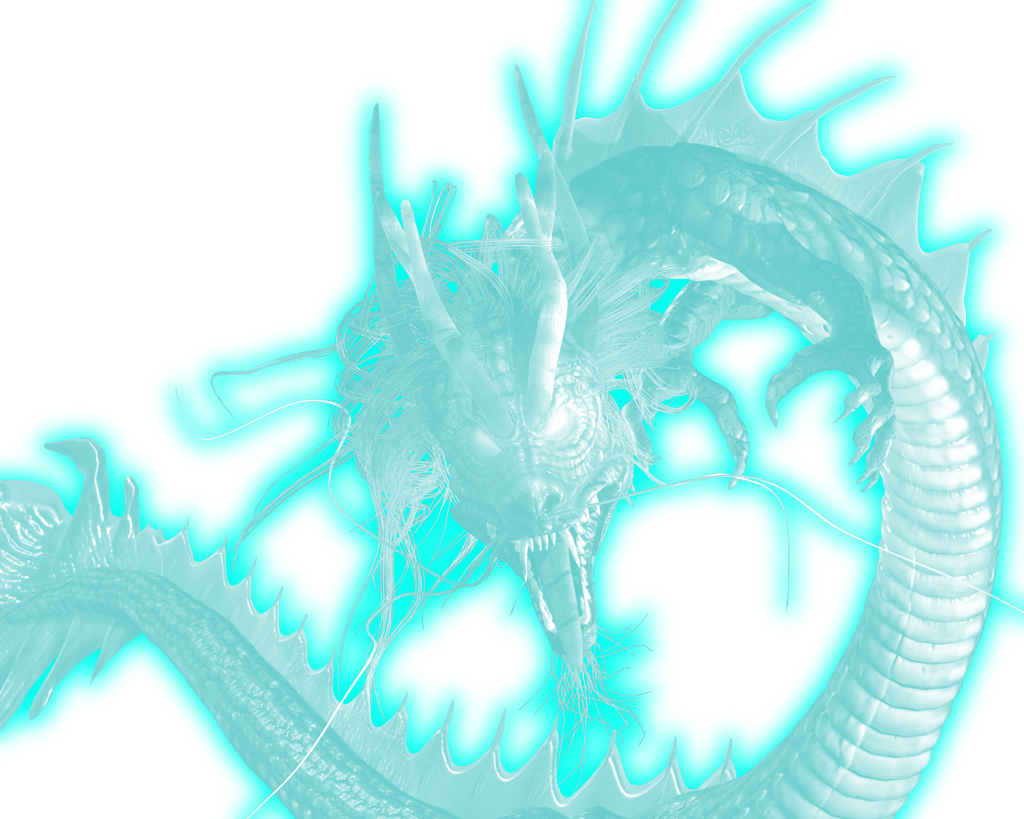
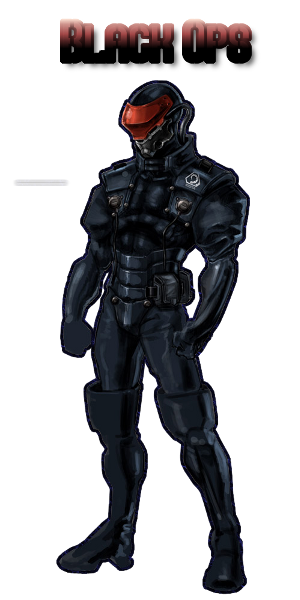
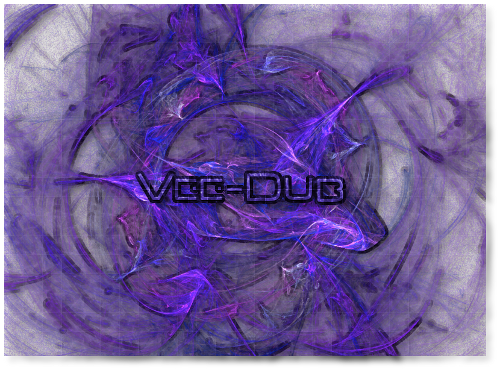
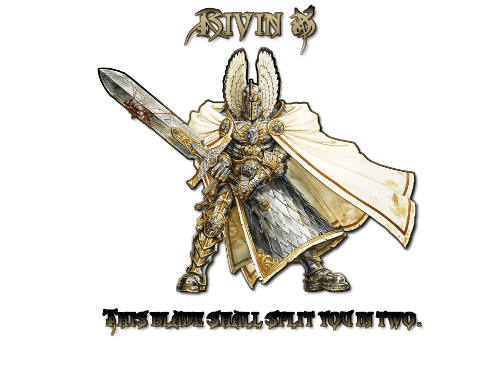
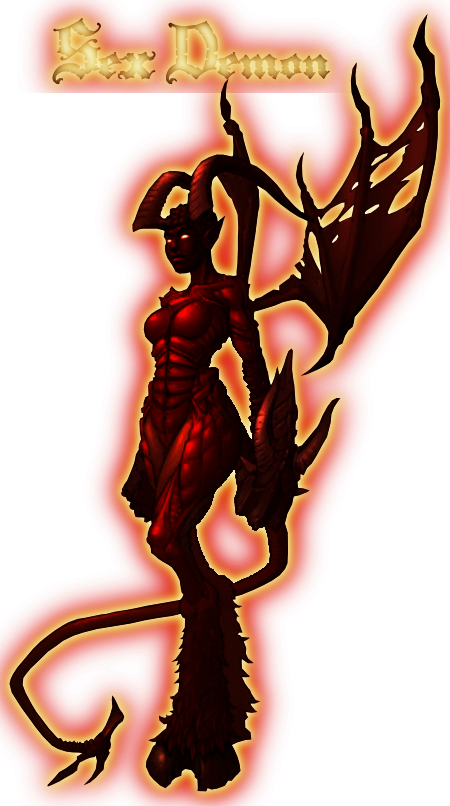
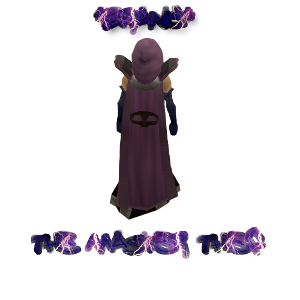
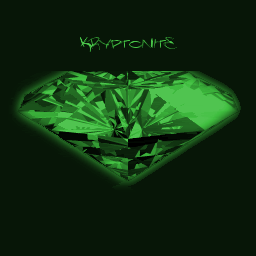
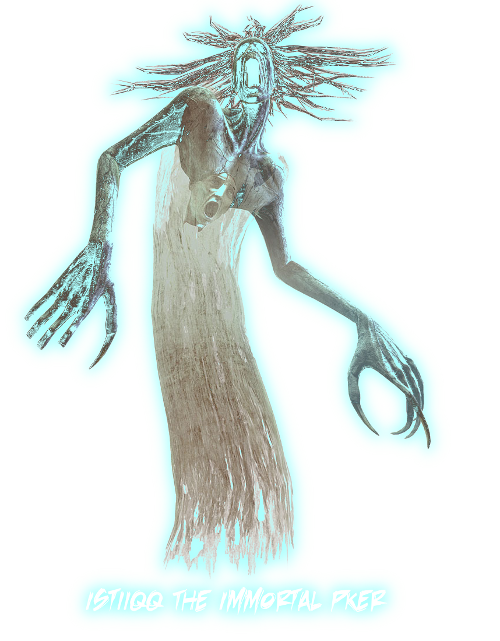
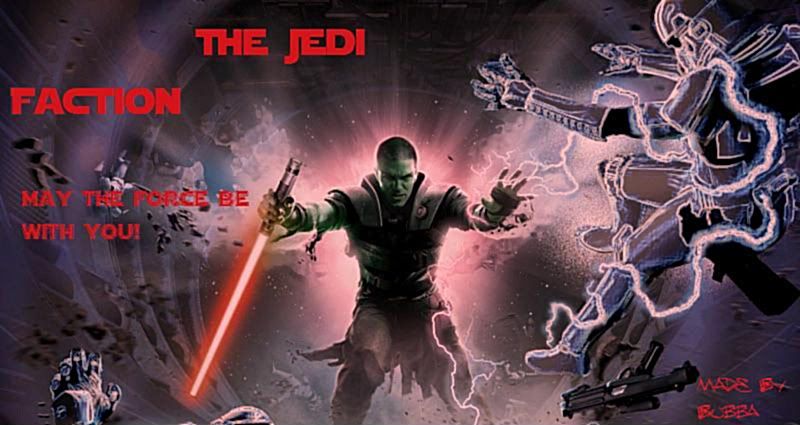
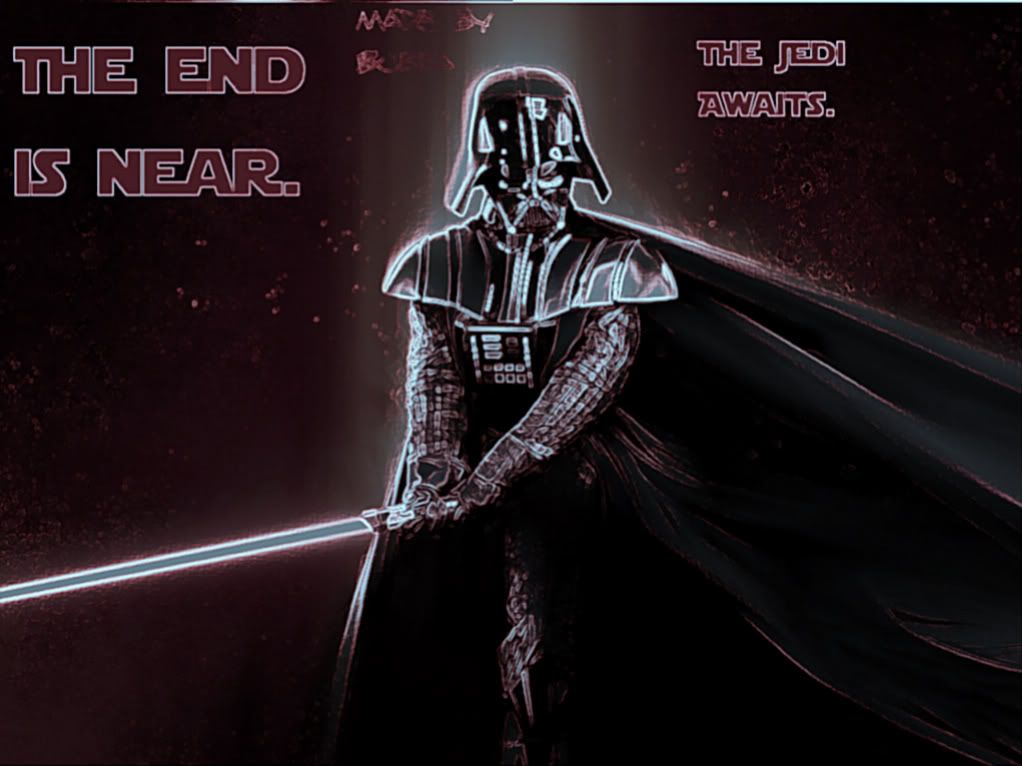
The renders shown at this link will give you a preview of how great my work is:Brianc's Gallery of Wonders. Version. 2 (Extreme Graphic Updates)


Let the requests come in!

Remember, this is a limited time offer!

Regards,
Brian Crowell
#62


(Û© á¹,ḜṜḈḦḀṆṬ'Ṩ ṎḞ ḌḜḀṬḦ Û©) are a group of Merchants eager to make more money, even if they have to kill you.


To join follow this application:


      Clan Application

                       (Û© á¹,ḜṜḈḦḀṆṬ'Ṩ ṎḞ ḌḜḀṬḦ Û©)                                                                                                                                                                                                                                                                                                     


-InGame Name:   
-Do you define yourself as a merchant?:
-Do you feel like you want to kill someone if you don't get what you want?:
-Do you like the smell of fear?
-Are you scared of the dark?:
-What is your combat level?:
                                                                                           
                                                                                           
-How good are you at Player Killing?:                                                       
                                                                                                                                                       
Signature in blood:                                                                                           

Use the format above, or get be-headed.


Ranks

Ò‰  Abaddon's - King of Demons  Ò‰

â"¼1 800 rares - (Leader)â"¼

â"¼ Raped DDz (Co-Leader)â"¼

Ò‰  Abigor's - Demonic General  Ò‰

â"¼Ipwn1231â"¼

â"¼KillStrikeâ"¼


Ò‰  Aguares's - Demonic Captain  Ò‰

â"¼Unknowedâ"¼
â"¼Zokainâ"¼

Ò‰  Geryon's - Demonic Squire  Ò‰

â"¼â"¼
-
-

Ò‰  Imps - Demonic Minion  Ò‰

â"¼â"¼
â"¼â"¼
-
-
-
-
-
-

Ò‰  Legends  Ò‰
â"¼â"¼
[/center]
#63
General (WS) / brianc is back
November 27, 2010, 05:01:52 PM
Hello,

It's been a while since I have made a post.

I have been extremely busy...

But I'm glad to back at AllGoFree - WorldScape Blitz.

Hope to see you guys in-game.

Regards,
Brian Crowell
#64
Here you guys go.
All that wanted to hear a sample of my music.

Track: DJ Echo - Echo of the Music - Vol 2
Album: Echo of the Music
Artist: DJ Echo (That is my DJ Name)

Please feel free to comment!
(Music auto plays)
Private Message me if you want a copy of my MP3 Track.

Regads,
Brian Crowell

http://www.swfcabin.com/swf-files/1288558358.swf
#65
General (WS) / Melvin is back!
October 29, 2010, 09:58:45 PM
Hello everyone,

I apologies for being gone from my friends for so long.
I have been trying to get on with my life; Getting ready to move to Kansas City, MO. Coming January.
It's good to be back with WorldScape-Blitz.

I hope to see you all in-game.

Regards,
Brian Crowell
#66
Hello,

I have been getting alot of requests to post more guides on making your computer faster, so here is another guide to help you do just that.

Disable indexing services

Indexing Services is a small little program that uses large amounts of RAM and can often make a computer endlessly loud and noisy. This system process indexes and updates lists of all the files that are on your computer. It does this so that when you do a search for something on your computer, it will search faster by scanning the index lists. If you don't search your computer often, or even if you do search often, this system service is completely unnecessary. To disable do the following:

1. Go to Start
2. Click Settings
3. Click Control Panel
4. Double-click Add/Remove Programs
5. Click the Add/Remove Window Components
6. Uncheck the Indexing services
7. Click Next


Optimise display settings

Windows XP can look sexy but displaying all the visual items can waste system resources. To optimise:

1.Go to Start
2. Click Settings
3. Click Control Panel
4. Click System
5. Click Advanced tab
6. In the Performance tab click Settings
7. Leave only the following ticked:
- Show shadows under menus
- Show shadows under mouse pointer
- Show translucent selection rectangle
- Use drop shadows for icons labels on the desktop
- Use visual styles on windows and buttons


Disable performance counters

Windows XP has a performance monitor utility which monitors several areas of your PC's performance. These utilities take up system resources so disabling is a good idea.

To disable:

1. download and install the Extensible Performance Counter List
2.Then select each counter in turn in the 'Extensible performance counters' window and clear the 'performance counters enabled' checkbox at the bottom.button below.


Speedup folder browsing

You may have noticed that everytime you open my computer to browse folders that there is a slight delay. This is because Windows XP automatically searches for network files and printers everytime you open Windows Explorer. To fix this and to increase browsing significantly:

1. Open My Computer
2. Click on Tools menu
3. Click on Folder Options
4. Click on the View tab.
5. Uncheck the Automatically search for network folders and printers check box
6. Click Apply
7. Click Ok
8. Reboot your computer


Improve memory usage

Cacheman Improves the performance of your computer by optimizing the disk cache, memory and a number of other settings.

Once Installed:

1.Go to Show Wizard and select All
2.Run all the wizards by selecting Next or Finished until you are back to the main menu. Use the defaults unless you know exactly what you are doing.
3.Exit and Save Cacheman
4.Restart Windows


Optimise your internet connection

There are lots of ways to do this but by far the easiest is to run TCP/IP Optimizer.

1. Download and install
2. Click the General Settings tab and select your Connection Speed (Kbps)
3. Click Network Adapter and choose the interface you use to connect to the Internet
4. Check Optimal Settings then Apply
5. Reboot


Optimise your pagefile

If you give your pagefile a fixed size it saves the operating system from needing to resize the page file.

1. Right click on My Computer and select Properties
2. Select the Advanced tab
3. Under Performance choose the Settings button
4. Select the Advanced tab again and under Virtual Memory select Change
5. Highlight the drive containing your page file and make the initial Size of the file the same as the Maximum Size of the file.

Windows XP sizes the page file to about 1.5X the amount of actual physical memory by default. While this is good for systems with smaller amounts of memory (under 512MB) it is unlikely that a typical XP desktop system will ever need 1.5 X 512MB or more of virtual memory. If you have less than 512MB of memory, leave the page file at its default size. If you have 512MB or more, change the ratio to 1:1 page file size to physical memory size.


Run BootVis - Improve boot times

BootVis will significantly improve boot times

1. Download and Run
2. Select Trace
3. Select Next Boot and Driver Trace
4. A Trace Repetitions screen will appear, select Ok and Reboot
5. Upon reboot, BootVis will automatically start, analyze and log your system's boot process. When it's done, in the menu go to Trace and select Optimize System
6. Reboot.
7. When your machine has rebooted wait until you see the Optimizing System box appear. Be patient and wait for the process to complete


Remove the desktop picture

Your desktop background consumes a fair amount of memory and can slow the loading time of your system. Removing it will improve performance.

1. Right click on Desktop and select Properties
2. Select the Desktop tab
3. In the Background window select None
4. Click Ok


Remove fonts for speed

Fonts, especially TrueType fonts, use quite a bit of system resources. For optimal performance, trim your fonts down to just those that you need to use on a daily basis and fonts that applications may require.

1. Open Control Panel
2. Open Fonts folder
3. Move fonts you don't need to a temporary directory (e.g. C:\FONTBKUP?) just in case you need or want to bring a few of them back. The more fonts you uninstall, the more system resources you will gain.

Disable unnecessary services

Because Windows XP has to be all things to all people it has many services running that take up system resources that you will never need. Below is a list of services that can be disabled on most machines:

Alerter
Clipbook
Computer Browser
Distributed Link Tracking Client
Fast User Switching
Help and Support - (If you use Windows Help and Support leave this enabled)
Human Interface Access Devices
Indexing Service
IPSEC Services
Messenger
Netmeeting Remote Desktop Sharing (disabled for extra security)
Portable Media Serial Number
Remote Desktop Help Session Manager (disabled for extra security)
Remote Procedure Call Locator
Remote Registry (disabled for extra security)
Remote Registry Service
Secondary Logon
Routing & Remote Access (disabled for extra security)
Server
SSDP Discovery Service - (Unplug n' Pray will disable this)
Telnet
TCP/IP NetBIOS Helper
Upload Manager
Universal Plug and Play Device Host
Windows Time
Wireless Zero Configuration (Do not disable if you use a wireless network)
Workstation
To disable these services:

Go to Start and then Run and type "services.msc"
Doubleclick on the service you want to change
Change the startup type to 'Disable"


Turn off system restore

System Restore can be a useful if your computer is having problems, however storing all the restore points can literally take up Gigabytes of space on your hard drive. To turn off System Restore:

Open Control Panel
Click on Performance and Maintenance
Click on System
Click on the System Restore tab
Tick 'Turn off System Restore on All Drives'
Click 'Ok'


Defragment your pagefile

Keeping your pagefile defragmented can provide a major performance boost. One of the best ways of doing this is to creat a separate partition on your hard drive just for your page file, so that it doesn't get impacted by normal disk usage. Another way of keeping your pagefile defragmented is to run PageDefrag. This cool little app can be used to defrag your pagefile, and can also be set to defrag the pagefile everytime your PC starts. To install:

Download and Run PageDefrag
Tick "Defrag at next Reboot",
Click "Ok"
Reboot


Speedup folder access - Disable last access update

If you have a lot of folders and subdirectories on your computer, when you access a directory XP wastes a lot of time updating the time stamp showing the last access time for that directory and for ALL sub directories. To stop XP doing this you need to edit the registry. If you are uncomfortable doing this then please do not attempt.

Go to Start and then Run and type "regedit"
Click through the file system until you get to "HKEY_LOCAL_MACHINE\System\CurrentControlSet\Contr ol\FileSystem"
Right-click in a blank area of the window on the right and select 'DWORD Value'
Create a new DWORD Value called 'NtfsDisableLastAccessUpdate'
Then Right click on the new value and select 'Modify'
Change the Value Data to '1'
Click 'OK'


Disable system sounds

Surprisingly, the beeps that your computer makes for various system sounds can slow it down, particularly at startup and shut-down. To fix this turn off the system sounds:

Open Control Panel
Click Sounds and Audio Devices
Check Place volume icon in taskbar
Click Sounds Tab
Choose "No Sounds" for the Sound Scheme
Click "No"
Click "Apply"
Click "OK"


Improve boot times

A great new feature in m*cro$oft Windows XP is the ability to do a boot defragment. This places all boot files next to each other on the disk to allow for faster booting. By default this option in enables but on some builds it is not so below is how to turn it on.

Go to Start Menu and Click Run
Type in "Regedit" then click ok
Find "HKEY_LOCAL_MACHINE\SOFTWARE\m*cro$oft\Dfrg\BootOp t imizeFunction"
Select "Enable" from the list on the right
Right on it and select "Modify"
Change the value to "Y to enable"
Reboot


Improve swapfile performance

If you have more than 256MB of RAM this tweak will considerably improve your performance. It basically makes sure that your PC uses every last drop of memory (faster than swap file) before it starts using the swap file.

Make your menus load faster

What this tweak does is remove the slight delay between clicking on a menu and XP displaying the menu.

Go to Start then Run
Type 'Regedit' then click 'Ok'
Find "HKEY_CURRENT_USER\Control Panel\Desktop\"
Select "MenuShowDelay"
Right click and select "Modify'
Reduce the number to around "100"
This is the delay time before a menu is opened. You can set it to "0" but it can make windows really hard to use as menus will open if you just look at them - well move your mouse over them anyway. I tend to go for anywhere between 50-150 depending on my mood


Make programs load faster

This little tweak tends to work for most programs. If your program doesn't load properly just undo the change. For any program:

Right-click on the icon/shortcut you use to launch the program
Select properties
In the 'target' box, add ' /prefetch:1' at the end of the line.
Click "Ok"
Voila - your programs will now load faster.


Improve xp shutdown speed

This tweak reduces the time XP waits before automatically closing any running programs when you give it the command to shutdown.

Go to Start then select Run
Type 'Regedit' and click ok
Find 'HKEY_CURRENT_USER\Control Panel\Desktop\'
Select 'WaitToKillAppTimeout'
Right click and select 'Modify'
Change the value to '1000'
Click 'OK'
Now select 'HungAppTimeout'
Right click and select 'Modify'
Change the value to '1000'
Click 'OK'
Now find 'HKEY_USERS\.DEFAULT\Control Panel\Desktop'
Select 'WaitToKillAppTimeout'
Right click and select 'Modify'
Change the value to '1000'
Click 'OK'
Now find 'HKEY_LOCAL_MACHINE\System\CurrentControlSet\Contr ol\'
Select 'WaitToKillServiceTimeout'
Right click and select 'Modify'
Change the value to '1000'
Click 'OK'


Speed up boot times I

This tweak works by creating a batch file to clear the temp and history folders everytime you shutdown so that your PC doesn't waste time checking these folders the next time it boots. It's quite simple to implement:

1. Open Notepad and create a new file with the following entries:

RD /S /q "C:\Documents and Settings\"UserName without quotes"\Local Settings\History"
RD /S /q "C:\Documents and Settings\Default User\Local Settings\History"
RD /S /q "D:\Temp\" <--"Deletes temp folder, type in the location of your temp folder"

2. Save the new as anything you like but it has to be a '.bat' file e.g. fastboot.bat or deltemp.bat

3. Click 'Start' then 'Run'

4. Type in 'gpedit.msc' and hit 'ok'

5. Click on 'Computer Configuration' then 'Windows Settings'

6. Double-click on 'Scripts' and then on 'Shutdown'

7. Click 'Add' and find the batch file that you created and then press 'Ok'


Speed up boot times II

When your PC starts it usually looks for any bootable media in any floppy or cd-rom drives you have installed before it gets around to loading the Operating System from the HDD. This can waste valuable time. To fix this we need to make some changes to the Bios.

1. To enter the bios you usually press 'F2' or 'delete' when your PC starts

2. Navigate to the 'Boot' menu

3. Select 'Boot Sequence'

4. Then either move your Hard drive to the top position or set it as the 'First Device'

5. Press the 'Escape' key to leave the bios. Don't forget to save your settings before exiting

Note: Once this change has been made, you won't be able to boot from a floppy disc or a CD-rom. If for some strange reason you need to do this in the future, just go back into your bios, repeat the steps above and put your floppy or CD-rom back as the 'First Device'


Speed up boot times III

When your computer boots up it usually has to check with the network to see what IP addresses are free and then it grabs one of these. By configuring a manually assigned IP address your boot time will improve. To do this do the following:

1. Click on 'Start' and then ''Connect To/Show All Connections'

2. Right-click your network adapter card and click 'Properties'.

3. On the 'General' tab, select 'TCP/IP' in the list of services and click 'Properties'

4.I n the TCP/IP properties, click 'Use the following address' and enter an IP address for your PC. If you are using a router this is usually 192.168.0.xx or 192.168.1.xx. If you are not sure what address you could check with your ISP or go to 'Start/run' and type 'cmd' and then 'ipconfig/all'. This will show your current IP settings which you will need to copy.

5. Enter the correct details for 'Subnet mask', 'Default gateway' and 'DNS Server'. Again if you are not sure what figures to enter use 'ipconfig/all' as in stage 4.


Free up memory

ClearMem Is an Excellent Tool for speeding up your XP Computer (especially if your system has been on for awhile and you have a lot of applications open). What it does, is it Forces pages out of physical memory and reduces the size of running processes if working sets to a minimum. When you run this tool, the system pauses because of excessive high-priority activity associated with trimming the working sets. To run this tool, your paging file must be at least as large as physical memory. To Check your Paging File:

1. Go to your control panel, then click on 'System', then go to the 'Advanced' Tab, and Under 'Performance' click 'Settings' then the 'Advanced' Tab

2. On the Bottom you should see 'Virtual Memory' and a value. This is the value that must be at least as large as how much memory is in your system.

3. If the Virtual Memory Value is smaller than your system memory, click Change and change the Min Virtual Memory to a number that is greater than your total system memory, then click 'Set' and Reboot.

4. Once you have rebooted install ClearMem


Ensure xp is using dma mode

XP enables DMA for Hard-Drives and CD-Roms by default on most ATA or ATAPI (IDE) devices. However, sometimes computers switch to PIO mode which is slower for data transfer - a typical reason is because of a virus. To ensure that your machine is using DMA:

1. Open 'Device Manager'

2. Double-click 'IDE ATA/ATAPI Controllers'

3. Right-click 'Primary Channel' and select 'Properties' and then 'Advanced Settings'

4. In the 'Current Transfer Mode' drop-down box, select 'DMA if Available' if the current setting is 'PIO Only'


Add correct network card settings

Some machines suffer from jerky graphics or high CPU usage even when a machine is idle. A possible solution for this, which, can also can help network performance is to:

1. RightClick 'My Computer'

2. Select 'Manage'

3. Click on 'Device Manager'

4. DoubleClick your network adaptor under 'Network Adapters'

5. In the new window, select the 'Advanced' tab

6. Select 'Connection Type' and select the correct type for your card and then Reboot


Remove annoying delete confirmation messages

Although not strictly a performance tweak I love this fix as it makes my machine 'feel' faster. I hate the annoying 'are you sure?' messages that XP displays, especially if I have to use a laptop touchpad to close them. To remove these messages:

1. Right-click on the 'Recycle Bin' on the desktop and then click 'Properties'

2. Clear the 'Display Delete Confirmation Dialog' check box and click 'Ok'

If you do accidently delete a file don't worry as all is not lost. Just go to your Recycle Bin and 'Restore' the file.


Disable prefetch on low memory systems

Prefetch is designed to speed up program launching by preloading programs into memory - not a good idea is memory is in short supply, as it can make programs hang. To disable prefetch:

1. Click 'Start' then 'Run'

2. Type in 'Regedit' then click 'Ok'

3. Navigate to 'HKEY_LOCAL_MACHINE\SYSTEM\CurrentControlSet\Contr ol\Session Manager\Memory Management\PrefetchParameters\'

4. Right-click on "EnablePrefetcher" and set the value to '0'

5. Reboot.

I hope you enjoyed my guide.

Regards,
Brian Crowell
#67
Hello,

I have been a-lot of requests for this guide.

First off, open Notepad®.

Copy the following code into Notepad®


mystring=(80000000)

Edit: This script changes how fast your ram responds top your computer, thus making your computer instantly faster.

Go to "File" then "Save as" set "Filetype" to all, set the directory to your desktop, set the name to "Speedboster.vbs" finally press save.

Go to your Desktop and double click Speedboster.

You will instantly notice a difference.

---------------------------

I hope you enjoyed my guide.

Contact Info

Windows Live: [email protected]
Skype: briancrowell

Or by Forum Private Message.

Regards,
Brian Crowell
#68
Report In-Game Rule Breakers / Reporting: Theninja
September 16, 2010, 05:20:17 PM
Your Username: 1 800 owned

Offender: TheNinja

Rule Broken: Offensive Language

Date: Thursday, September 16, 2010

Proof:

#69
General (OT) / My Uncle Bill.
September 12, 2010, 11:44:10 PM
Hello everyone.

Tonight is a sad night for me.

My Great Uncle Bill has died from Alzheimer's Disease a few hours ago.

I'm asking for special prayer from all that would care to show your support to my dead uncle.

The worst thing about it, I never got to meet him.

Regards,
Brian Crowell
#70
Weapons / Rune Woodcutting Axe.
September 10, 2010, 11:20:33 AM
Hello,

I'm buying a Rune WoodCutting Axe.

My offer is 250k cash.

Please contact me within the game if you have one, and willing to sell it.

Regards,
Brian Crowell
#71


(яσgÏ...Ñ"Ñ• σÆ' мιѕ¢нιÑ"Æ') ιѕ α gяσÏ...ρ σÆ' яσgÏ...Ñ"Ñ• ωιâ,,"â,,"ιηg Ñ,σ Ñ•Ñ,Ñ"αâ,," αηуÑ,нιηg.
ωÑ" αяÑ" Ñ,нÑ" Æ'Ï...Ñ,Ï...яÑ" σÆ' ωσяâ,,"âˆ,ѕ¢αρÑ" вâ,,"ιÑ,z, ωÑ" αяÑ" Ñ,нÑ" яσgÏ...Ñ"Ñ• σÆ' мιѕ¢нÑ"ιÆ'.


Ñ,σ נσιη Æ'σâ,,"â,,"σω Ñ,нιѕ αρρâ,,"ι¢αÑ,ιση:


Ï...Ñ•Ñ"яηαмÑ":
яÑ"αѕση Æ'σя נσιηιηg:
Ñ,нιÑ"νιηg â,,"Ñ"νÑ"â,,":
яÑ"Æ'Ñ"яÑ"η¢Ñ":

ρâ,,"Ñ"αѕÑ" Ï...Ñ•Ñ" Ñ,нÑ" Æ'σямαÑ, αвσνÑ", ωσÏ...â,,"âˆ,η'Ñ, ωαηÑ, Ñ,σ кιâ,,"â,," уσÏ....  ;D


--->αâ,,"â,,"ιÑ"âˆ, gÏ...ιâ,,"âˆ,Ñ•<---
Â¥ d乇ï¾'ï½²ã," ä¹™o刀乇 Â¥

яαηкѕ

Â¥ gяαηâˆ,мαѕÑ,Ñ"я яσgÏ...Ñ" Â¥ (â,,"Ñ"αâˆ,Ñ"яѕ)
â™ Old Melvinâ™  - (σωηÑ"я)
â™ â™ 
â™ â™ 

Â¥ ναηιѕнιηg яσgÏ...Ñ" Â¥ (â,,"ιÑ"Ï...Ñ,Ñ"ηαηÑ, Æ'ιяѕÑ,-¢â,,"αѕѕ)
â™ â™ 

Â¥ Ñ•Ñ,Ñ"αâ,,"Ñ,н яσgÏ...Ñ" Â¥ (gÑ"ηÑ"яαâ,,")
â™ â™ 
-

Â¥ αâˆ,ναη¢Ñ"âˆ, яσgÏ...Ñ" Â¥ (¢αρÑ,αιη)
â™ â™ 
â™ â™ 
â™ â™ 
â™ â™ 

Â¥ яσgÏ...Ñ" ιη Ñ,яαιηιηg Â¥ (Ñ,яαιηιÑ"Ñ")
-
-
-
-
-

Â¥ ρÑ"Ñ,Ñ,у Ñ,нιÑ"Æ' Â¥ (яÑ"¢яÏ...ιÑ,)
â™ â™ 
â™ â™ 
â™ â™ 
♠ι♠
-
-

¥вαηηιѕнÑ"âˆ, мÑ"мвÑ"яѕ Â¥ (вαηηÑ"âˆ,)
--->вяιαη<---
#72


(яσgÏ...Ñ"Ñ• σÆ' мιѕ¢нιÑ"Æ') ιѕ α gяσÏ...ρ σÆ' яσgÏ...Ñ"Ñ• ωιâ,,"â,,"ιηg Ñ,σ Ñ•Ñ,Ñ"αâ,," αηуÑ,нιηg.
ωÑ" αяÑ" Ñ,нÑ" Æ'Ï...Ñ,Ï...яÑ" σÆ' ωσяâ,,"âˆ,ѕ¢αρÑ" вâ,,"ιÑ,z, ωÑ" αяÑ" Ñ,нÑ" яσgÏ...Ñ"Ñ• σÆ' мιѕ¢нÑ"ιÆ'.


яÏ...â,,"Ñ"Ñ• αяÑ" αѕ Æ'σâ,,"â,,"σωѕ:

1. Æ'σâ,,"â,,"σω Ñ,нÑ" σяâˆ,Ñ"я σÆ' Ñ,нÑ" (яσgÏ...Ñ"Ñ• σÆ' мιѕ¢нιÑ"Æ').
2. âˆ,ση'Ñ, αѕк Ñ,σ Æ'σя α ρяσмσÑ,ιση, уσÏ...я Ñ,ιмÑ" ωιâ,,"â,," ¢σмÑ".
3. âˆ,ση'Ñ, αÑ,Ñ,α¢к αηу σÆ' уσÏ...я Æ'Ñ"â,,"â,,"σω яσgÏ...Ñ"Ñ•, σя уσÏ... ωιâ,,"â,," вÑ" ησσѕÑ"âˆ,.
4. â,,"ιѕÑ,Ñ"η αηâˆ, Æ'σâ,,"â,,"σω Ñ,нÑ" σяâˆ,Ñ"яѕ σÆ' αâ,,"â,," нιgнÑ"я яαηк яσgÏ...Ñ"Ñ•.
5. â,,"σσÑ, αâ,,"â,," gσâ,,"âˆ, αηâˆ, gÑ"мѕ уσÏ... Æ'ιηâˆ,, ωÑ" ѕнαâ,,"â,," яÑ"ωαяâˆ, Ñ,σ кιηâˆ,â,,"у.
6. αâ,,"â,," σяâˆ,Ñ"яѕ мÏ...Ñ•Ñ, вÑ" Ñ,σσк Ñ•Ñ"яισÏ...Ñ•, σя gÑ"Ñ, ησσѕÑ"âˆ,.
7. ιÆ' уσÏ... ѕнαâ,,"â,," â,,"Ñ"ανÑ" Ñ,нÑ" σяâˆ,Ñ"я αÑ, αηуÑ,ιмÑ" ωιÑ,нσÏ...Ñ, яÑ"αѕση σя ¢αÏ...Ñ•Ñ", уσÏ... ωιâ,,"â,," Ñ,σσкÑ"η Ñ,σ вÑ" ησσѕÑ"âˆ,.
_____________________________________________

Ñ,нÑ" ρÏ...ηιѕнмÑ"ηÑ,Ñ• αяÑ" αѕ Æ'σâ,,"â,,"σω.

αâ,,"â,,"ιÑ"η¢Ñ" яÑ"¢σgηιÑ,ιση: уσÏ... ѕнαâ,,"â,," вÑ" Æ'σяgινÑ"η, âˆ,ση'Ñ, âˆ,σ Ñ,нιѕ αgαιη.

вαηηιѕнιηg: уσÏ... ѕнαâ,,"â,," вÑ" вαηηιѕнÑ"âˆ, Æ'σя 5 âˆ,αуѕ Æ'яσм Ñ,нÑ" gÏ...ιâ,,"âˆ,.

нαηgιηg σÆ' Ñ,нÑ" Ï...ηâ,,"αωÆ'Ï...â,,": уσÏ... ѕнαâ,,"â,," вÑ" ησσѕÑ"âˆ,, Ñ,нιѕ ιѕ уσÏ...я â,,"αѕÑ, Ñ,ιмÑ" Ñ,σ Ñ,αѕÑ,Ñ" вâ,,"σσâˆ,.

Ñ•Ñ,αу ιη Ñ,нÑ" ѕнαâˆ,σωѕ, σя уσÏ... ωιâ,,"â,," вÑ" ѕσяяу.
#73
Hello,

My other topic is outdated.
So I'm making this topic, but this time better Graphics!
You ask how better than they already are?!
Just keep up to date with this Gallery and you'll see what I mean.

If you wish to have a Graphic made, please contact me by Private Message or In-Game.

Contact Information

Skype: briancrowell
Windows Live: [email protected]


Gallery Version. 2


Graphics Master's Signature. (Me)


Rogues of Mischief Banner.

Black Ops' Signature.

VeeDub's Signature.

Rivin X's Signature.

Fire b*tch.

The Gladiators.

The Immortal.

Sex Demon.


Frost Bite Sword.


Gallery Version. 1


Gomes97's Signature.


Drunk Mario's Signature

Master Thief Signature. (Me)

Master Strength Error's Signature.

3 H1t Qu1t's Signature.

Brianc's Signature. (Me)

Rory's Signature.

Kryptonite's Signature.

Lemon Heads' Signature.

Istiiqq's Signature.

Bubba's Signature. (Me)

The Jedi Main Logo.

The Jedi Header Logo

The Jedi Footer Banner.

Onyx Dragon Showcase Banner.

Onyx Dragon Front View.

Onyx Dragon Side View.

Ultimate Dragon Shield.
I hope you enjoyed my Updated Gallery.

Regards,
Brian Crowell
#74
Miscellaneous / Item sale.
August 28, 2010, 04:22:11 PM
Selling 2 easter eggs, 1 disk of returning.

Please contact me in game by Private Message or leave a post here with offer.

Regards,
Brian Crowell
#75
Please +Rep if this guide helped you.
#Request Sticky


Hello,

It has come to my attention that I should make a topic regarding this issue.

People tend to get a-lot of Viruses or Ad-Aware.

These micro programs can cause harm to your computer and is most likely the cause for many people having problems with Runescape Servers.

Understanding Viruses

    Practically everyone with a computer has heard of computer viruses, but not everyone knows exactly what they are or how viruses can affect their computer. A virus is a small, self-replicating program that invades your system through an e-mail attachment, download, or Web site. People create viruses for various reasons, ranging from mild pranks to malicious destruction.

    As a result, the effects of a virus can vary from moderately annoying to absolutely crippling. The Wazzu virus, for example, attaches itself to Microsoft Word documents and inserts the nonsense word "?wazzu?" in the document and rearranges random strings of words. A virus such as this one is definitely annoying, but not necessarily catastrophic.

    Some viruses can be much more serious, however, threatening to destroy data or even erase your entire hard drive. One such virus spread by e-mail, Worm.ExploreZip, takes control of the infected computer's e-mail system and automatically responds to all incoming mail messages. It also sends destructive e-mail attachments that can erase certain types of files.

    Viruses can be harmful, but it's also important to understand the role you play in propagating them. Viruses generally do not invade a computer without user action. In other words, you set the virus loose on your own computer by opening infected programs or files. If you take certain precautions, such as not opening email attachments from unknown sources and running antivirus software, you can minimize the risk of infecting your own computer.

Types of Viruses

By familiarizing yourself with the types of viruses that exist, you'll be better able to prevent them.

Program viruses attach themselves to executable files such as .exe files. Each time you run the program, the virus duplicates itself and attaches to other programs. Sharing programs with other computers, either by disk or on a network, spreads these types of viruses. You are also at risk for this type of virus when you download applications from the Internet.

Macro viruses are contained in the macro commands for programs such as Microsoft Word and Excel. Perhaps the most prevalent type of virus, they attach themselves to files (as opposed to programs) and are some of the hardest viruses to detect.

Boot sector viruses infect particular files on your hard drive that execute when you boot your computer. When you boot from the infected disk, the boot sector virus attaches itself to the boot files on your hard drive.

Trojan horses aren't viruses by definition because they don't replicate themselves. They do, however, possess the same potential to damage your hard drive if they go undetected. They typically arrive in an e-mail with a vague subject line or a promise of entertainment. When let loose, the Trojan horse -- much like its namesake in Greek mythology -- introduces a slew of unwanted attackers that can wreak havoc on your hard drive.

How to protect yourself from viruses

1. Install Anti-Virus Software - This should not even have to be listed, if you don’t have anti-virus software installed, you’re asking for trouble! And if your reason for not installing anti-virus software is because it’s too expensive, then that can reason can be shot down because there are several free anti-virus programs out there that are considered better than commercial software packages. Here are two of the most popular ones:
AVG Anti-Virus â€" Very good and completely free.
Avast Anti-Virus â€" Almost on par with AVG.
Kaspersky Anti-Virus â€" Not free, but one of the best detection rates.

2. Update All Software - Installing an anti-virus program by itself is not enough. There are hundreds of new threats that are found daily and the anti-virus programs release updates regularly to combat the new threats. Make sure you anti-virus program is set to update automatically so that you don’t have to rely on your memory to do it. Also, this goes for all the software on your computer. The most important software to keep up to date is your Windows operating system. It is essential to have Automatic Updates turned on and set to download and install updates automatically.

3. Install only Trusted Software - If you’re not sure what a piece of software does from it’s name, then don’t install it. Also, don’t install anything you didn’t intend to install in the first place. Sometimes programs will ask you to install other programs during the install of the first application. Be careful of that because it’s usually spyware. Install software from big names sites only, such as Microsoft or Adobe.

4. Avoid P2P File Sharing Software â€" If used with great caution, P2P software is quite useful for movies, songs and software, but if you’re not very technically savvy, you might end up downloading a song that has a keystroke logger attached to it that will send anything you type to some other computer over the Internet. It’s almost impossible to tell that this is occurring unless your anti-virus or anti-spyware programs pick it up in their scans.

5. Delete Unknown Emails â€" If you receive emails from random people’s names, do not bother to open the email, just delete it. If you have any doubts after reading the name and the subject, it’s probably not someone you know. Never download or open attachments unless you are sure it’s from someone you know. Give the person a call quickly and ask them if you’re not sure. Most large companies that you create online accounts with will not send you attachments unless you specifically ask for them through their web site. Also, be wary of any emails from sites pretending to be banks, auction sites, etc asking for you to verify bank account info or address info. No bank ever does that.

6. Do not click on Ads - Avoid clicking on ads if you can. Especially those ads where something is flying around and if you shoot the duck, you win some prize! Ads have become more sophisticated in that they try to make the ad interactive so that you’ll be tempted to play it like a game.

7. Run Virus Scans Regularly â€" If you’re not in the mood to scan every day, at least run a scan once a week. Actually, setup a schedule for your computer in your anti-virus software to run a scan late at night or whenever you don’t use your computer and that way you won’t be bothered with a slow computer.

8. Be careful what you attach to your computer â€" This is a more common way to transfer viruses than you might think. Everyone now has a USB flash stick that they carry around on their key chains, ready to snap into any computer. But who knows what your viruses are on your friends computers and what accidentally got transferred to their USB stick. A lot of virus programs will auto launch right when the USB stick is put into the computer, so you don’t even have to open or download any of the files to be infected.

9. Avoid Shady Web Sites â€" If you need to look at porn, then make sure you do it in a virtual environment. You are DEFINITELY going to get some virus or spyware if you browse porn sites on your computer. Virtualization basically allows you to run programs like Internet Explorer in a virtual environment that does not effect your current operating system. If you want to find out more, search for “Virtual PC” or “VM Ware” in Google. Otherwise, simply avoid going to shady web sites!

10. Turn On or Install a Firewall - If you’re running Windows XP, make sure Windows Firewall is turned on. A firewall prevents hackers from gaining access to your computer by limiting the number of ports that are open to the public. Also, when buying a wireless router, make sure it has a built in firewall. Having a software and hardware firewall is better than just having one or the other.

11. Secure Your Wireless Network â€" Most wireless routers are set to no security when you install them. Be sure to log into the router and at least set the basic security that requires a password. There are stronger encryption options, but if you don’t understand those, then simply set a password on the router, otherwise anyone can connect to your home network and access everything.

12. Use a Complex Password for Login â€" This means that you should already have a password to login to your computer. Not having a password at all is not a good idea. Create a password for all user accounts and make sure it’s complex. Complex means it should have numbers, upper case characters, lower case characters, and symbols. This makes it way more difficult for a hacker to get into your computer.

I hope you have enjoyed my Guide on how to keep your Computer safe from Viruses and Hackers.

If you have questions, feel free to contact me by the following ways:

Skype: briancrowell
Windows Live: [email protected]
Or Forum Private Message.

Regards,
Brian Crowell
#76
Hello,

I'm releasing a Dragon Animation.

Please contact me if you want this Animated used for a Signature for you.

I'm offering special Signatures on request.

Notes:
All of my Signatures / Banners are High Detailed rendered.
This render may also be resized to your liking.

Please contact me by the following ways.

Skype: briancrowell

Windows Live: [email protected]

In-Game: 1 800 Rarez

Or Forum by Private Message.

Preview:


#77
Quote from: brianc on August 19, 2010, 02:21:37 AMEDIT: Please +Rep if this helped. -Thanks

EDIT:
As Requested.
Source:
http://cs.gmu.edu/cne/modules/vm/green/defn.html


Hello,

I have been seeing alot of complaints about game lag, or not being able to run the client due to low memory.

This is a tutortial that will fix that problem.

Enjoy.

   
Definition 

Virtual memory is a technique that allows processes that may not
be  entirely in the memory to execute by means of automatic
storage allocation upon request.  The term virtual memory refers to
the abstraction of separating  LOGICAL memory--memory as seen by
the process--from PHYSICAL memory--memory as seen by the
processor.  Because of this separation, the programmer needs to be aware
of only the logical memory space while the operating system maintains
two or more levels of physical memory space.
The virtual memory abstraction is implemented by using secondary
storage to augment the processor's main memory.  Data is transferred
from secondary to main storage as and when necessary and the data
replaced is written back to the secondary storage according to a
predetermined replacement algorithm.
  If the data swapped is designated a fixed size, this swapping is
called paging;  if variable sizes are permitted
and the data is split along logical lines such as subroutines or
matrices, it is calledsegmentation.  Some operating systems combine
segmentation and paging.   [S2]


   The  diagram illustrates that a program generated address ( 1 )
  or "logical address" consisting of a logical page number plus the
location within that page (x) must be interpreted or "mapped" onto an
actual (physical)   main memory address by the operating system using an
address translation function or
mapper  ( 2 ).  If the page
is present in the main memory, the mapper substitutes the physical page
frame number for the logical number  ( 3 ).  If the mapper
detects that the page requested is not present in main memory, a fault
occurs and the page must be read into a frame in main memory from
secondary storage  ( 4 , 5  ).
pp. 161-165
   What do you think are the main considerations in implementing this
virtual memory system?


Some error messages that require you to change the virtual memory settings:

“Your system is low on virtual memory” error message when you try to start an program

Changing the virtual memory settings in Windows XP:

1. Right-click 
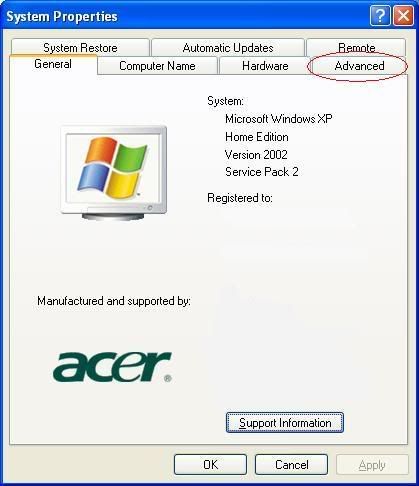
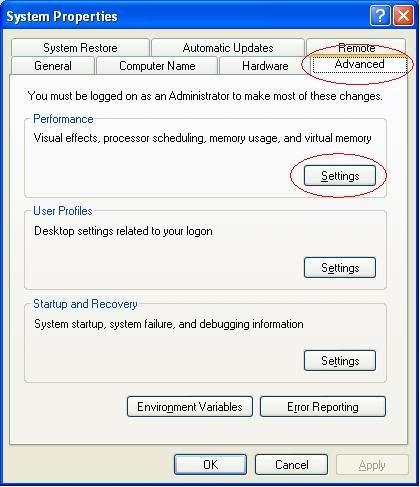
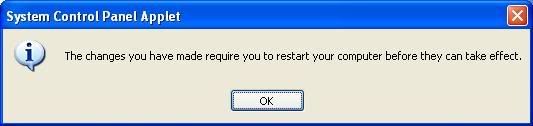
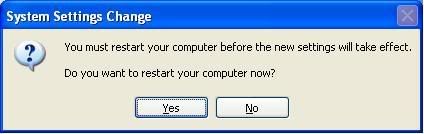
and select Properties, OR Click on Start and then click Run and in the Box type: sysdm.cpl and press enter.

And then you will see this:


2. Click on the "Advanced Tab" and then click "Settings" like this :


3. Then click the "Advanced Tab" and by "Virtual Memory" click "Change" like this :


4. Then you can choose a custom size or let Windows choose. I recommend letting windows choose because changing it to a custom size is more for Advanced users. Then click "Set" and "Ok".
You can set virtual memory on each physical drive but not each partition.


5. Click ok when you see this:


6. Then click on OK in Virtual Memory window.

7. Then click on OK in Performance Options window.

8. Then click Yes when you see this:


Regards,
Brian Crowell
#78
Tutorials/Guides (OT) / GUIDE: Java - JavaScript
August 19, 2010, 01:34:59 AM
Quote from: brianc on August 19, 2010, 01:34:59 AMEDIT: Please +Rep if this helped. -Thanks
#Request Sticky


Hello,

This is a Full tutorial for Java and JavaScript Programming.

I hope you enjoy.


The New Face of
Computer Science Education - The Scratch Generation


002 The Importance of Sun's Java Documentation


905
Types, Classes, and Objects


9000
Sample Programs, Set 1
9001
Sample Programs, Set 2
9002
Sample Programs, Set 3


1600 The Essence of OOP Using Java, Objects, and Encapsulation
1602 The Essence of OOP using Java, Classes
1604 The Essence of OOP Using Java, Inheritance, Part 1
1606 The Essence of OOP Using Java, Inheritance, Part 2
1608 The Essence of OOP Using Java, Polymorphism Based on Overloaded Methods
1610 The Essence of OOP using Java, Polymorphism, Type Conversion, Casting, Etc.
1612 The Essence of OOP using Java, Runtime Polymorphism through Inheritance
1614 The Essence of OOP using Java, Polymorphism and the Object Class
1616 The Essence of OOP using Java, Polymorphism and Interfaces, Part 1
1618 The Essence of OOP using Java, Polymorphism and Interfaces, Part 2
1620 The Essence of OOP using Java: Static Members
1622 The Essence of OOP using Java, Array Objects, Part 1
1624 The Essence of OOP using Java, Array Objects, Part 2
1626 The Essence of OOP using Java, Array Objects, Part 3
1628 The Essence of OOP using Java, The this and super Keywords

1630 The Essence of OOP using Java, Exception Handling


Note, the following lessons on The Essence of OOP are considered to be Intermediate level material.  They are included here because they are part of the comprehensive series on The Essence of OOP.

1632 The Essence of OOP using Java, Static Initializer Blocks
1634 The Essence of OOP using Java, Instance Initializers
1636 The Essence of OOP using Java, Member Classes
1638 The Essence of OOP using Java, Local Classes
1640 The Essence of OOP using Java, Anonymous Classes
1642 The Essence of OOP using Java, Nested Top-Level Classes


Java Advanced Placement (Java AP) Study Guide Lessons
AP002 Introduction to the Lessons, Primitive Types
AP004 Assignment and Arithmetic Operators
AP006 Relational Operators, Increment Operator, and Control Structures
AP008 Logical Operations, Numeric Cast, String Concatenation, and the toString() Method
AP010 Escape Character Sequences and Arrays
AP012 More on Arrays
AP014 Method Overloading
AP014 Method Overloading - Revised for V1.4.2 08/03/04


AP016 Classes, Constructors, Setter Methods, and Getter Methods

AP018 The super Keyword, final Keyword, and static Methods
AP020 The this Keyword, static final Variables, and Initialization of Instance Variables
AP022 Extending Classes, Overriding Methods, and Polymorphic Behavior
AP024 Interfaces and polymorphic behavior
AP026 Comparing Objects, Packages, Import Directives, and Some Common Exceptions
AP028 Type Conversion, Casting, Common Exceptions, Public Class Files, javadoc comments and Directives, and Null References


004 Object-Oriented Programming
006
Books, Tools, FAQ, Links, etc. (previously Misc Java Notes)
008
Similarities and Differences between Java and C++
010
Hello World
012
Defining a Class
014
The main() Method
016
Using the System and PrintStream Classes
017
Introduction to Graphical User Interfaces (GUI)
018
Introduction to Applets
020
Variables
022
Operators
024
Expressions
026
Flow of Control
028
Arrays and Strings

029 Object Oriented Development (under construction
and unavailable)

030
Brief Introduction to Exceptions
031
OOD -- The Painter's Canvas Problem
032
Command-Line Arguments
034
Standard Input and Output Streams
036
Objects
038
Classes
039
Packages
040
Access Control
042
Instance Members, Class Members, Constructors, and Finalization
044
More on Inheritance
046
More on Interfaces

048 Packages - See lesson #39

050
String and StringBuffer
052
Setting Program Attributes
054
Using System Resources
056
Handling Errors Using Exceptions
057 Chained Exceptions in Java


Data Structures
1350 Data Structures in Java: Part 1, Getting Started

1352 Data Structures in Java: Part 2, What Is a Collection?

1354 Data Structures in Java: Part 3, Purpose of Framework Interfaces

1356 Data Structures in Java: Part 4, Purpose of Implementations and Algorithms

1358 Data Structures in Java: Part 5, The Core Collection Interfaces

1360 Data Structures in Java: Part 6, Data Structures in Java: Part 6, Duplicate Elements, Ordered Collections, Sorted Collections, and Interface Specialization

1362 Data Structures in Java: Part 7, The Comparable Interface, Part 1

1364 Data Structures in Java: Part 8, The Comparable Interface, Part 2

1366 Data Structures in Java: Part 9, The Comparator Interface, Part 1

1368 Data Structures in Java: Part 10, The Comparator Interface, Part 2

1370 Data Structures in Java: Part 11, The Comparator Interface, Part 3

1372 Data Structures in Java: Part 12, The Comparator Interface, Part 4

1374 Data Structures in Java: Part 13, The Comparator Interface, Part 5

1376 Data Structures in Java: Part 14, The Comparator Interface, Part 6

1378 Data Structures in Java: Part 15, The toArray Method, Part 1

1380 Data Structures in Java: Part 16, The toArray Method, Part 2

Regards,
Brian Crowell
#79
Tutorials/Guides (OT) / GUIDE: How to make a banner.
August 19, 2010, 12:15:49 AM
Quote from: brianc on August 19, 2010, 12:15:49 AMEDIT: Please +Rep if this helped. -Thanks
#Request Sticky


Hello,

People often ask me to teach them how to use paint, so I decided to just make a guide on how to do it. Here we go guys:


The first thing you'll want to do is find your renders. Renders are images without a background. This is what a render looks like.


You can make renders, but it's a bit hard depending on the card your trying to render. If you can't make them yourself, you can find them on the internet, or have someone with photoshop make them for you.

After you have the renders of the images you want, the next thing is to get them in the banner.

The first step to making a banner on paint.net is as soon as you open paint, you should have a large white empty canvas. Before doing anything else, go up to the bar with all the options in it like file, edit, image etc. Click image, and re-size it to 510x110. MAKE SURE YOU UNCHECK THE LITTLE BOX THAT SAYS "MAINTAIN ASPECT RATIO"
Re-sizing the canvans to 510x10 will keep your images from merging into one another.

After you've re-sized your canvas, go up to file, and open the image(s) you want to be in the banner. Once you have them opened, you'll need to get your background. Your background will need to be added into the banner before the images. You can find the images on google, for example THIS would make a very beautiful background once you tweak it up a little bit. I'll go over that later though.

Now, say your using that image i just showed you, save it, then open it in paint. After it's opened go over to your tool bar, and click the move selected selected pixels tool, or the little back arrow. Then click the background you'll be using, and click " Ctrl C' on your keyboard. Then go over to your empty canvas, and click "CRTL V" on your keyboard.
A WINDOW SHOULD POP UP THAT SAYS "EXPAND CANVAS SIZE, KEEP CANVAS SIZE, OR CANCEL" MAKE SURE YOU CLICK "KEEP CANVAS SIZE" Now your background should be inside the canvas, and you can move it around freely. Move it to where you want it, or just leave it alone completely.

After you have your background the way you want it, it's time to move your images/renders into the banner.

If you have renders, your going need to use the magic wand. The magic wand is probably the most frustrating tool in paint.net. The way to use it is go over to your tool bar, and click the magic wand tool. It looks like a little black magic wand. After you have that, go over to your render. Now here's The Tricky part. You'll need to set the "Tolerance Bar" that is located at the top of the screen based on how many pixels your render consists of. And there's no way to find out how many are in there. So you'll just have to move the tolerance bar back and forth until you find the right setting. Click your image with the wand every once in a while to see if you have it right. If it's right, the render should be highlighted in blue, with a black outline. You'll know when it's right.

Now after you have it right, just click " CTRl C" to copy the render, bring it over to your canvas, and click "ctrl v" to paste it into your canvas. Do the same thing for the rest of the renders you have and your done. Well your mostly done anyways.

The next thing you may or may not want to do is add some effects to the banner. To add effects, which paint has a lot of, just go up to, and click effects. Go down to where it says "Distort" and play around with the options and tweak your banner the way you want. I recommend softening the portrait, as this will erase the outline of the renders you moved into your canvas. You may notice that softening your portrait may make the picture darker, and some other things. If it does that, you can just sharpen the portrait to make it a little more colorful. After you've added effects, make sure you save your banner unless you wanna do it all over again.

Now after you've added effects and all that fun stuff, go to internet explorer/firefox whatever it is you have, and go to www.photobucket.com You'll need to register a username here so you upload them for a huge album.


If you wanna have a matching avatar, just do the same stuff, except when you re-size the canvas in paint, re-size it to 135x135 instead of 510x110.

Good luck, I hope I helped, and if you have any questions please let me know.

P.S. Please don't give up because you can't do it right the first time. By the words of some dude I've never heard of "Practice makes perfect" Lol.

Regards,
Brian Crowell
#80
Hello,

Here is the banner for my Onyx Dragon ShowCase.

Please comment and +Rep if you like it!


Regards,
Brian Crowell